18th century half-boned stays
Six years ago, I made my first pair of stays and wore them to every 18th century event I've participated in. Overtime it was starting to become very evident that there was some wear and tear and in some serious need for adjustments. For example, bones were sliding out of their channels and jabbing me in sensitive areas, the stays tabs never really sat on my hips but above them and I had to keep adjusting the stays, and the size of the stays were bigger than how they're supposed to fit and needed to be taken in a few inches...Needless to say, it was just finally time to hang them up and make a new pair.
 |
| My 1st pair of stays |


Yes, I should be wearing an under-petticoat and neckerchief for modesty, but I wanted to show you the outcome of what it looked like once it was finished.

Unlike my first pair of stays from J.P.Ryan, I wanted this pair to have straps and to be half-boned stays. I opted to try out the new American Duchess pattern... I was not disappointed. Because this pattern is part of Simplicity's line, the pattern's instructions were very easy to follow, and I mean VERY easy. I had minimal complications and was able to crank this project out within a few days.

I did a few things differently with this new pair. First and foremost was lengthening the stays so the tabs would actually sit on my hips rather than on my waist. When I made my first pair 6 years ago, I didn't understand that concept and with regret did not bother to do the research on how to properly make adjustments. Now, after getting annoyed with the tabs constantly jabbing me in the waist and having to periodically adjust them, I realized that this pair needed to be longer. After lengthening it a few inches, I finally feel comfortable for once!
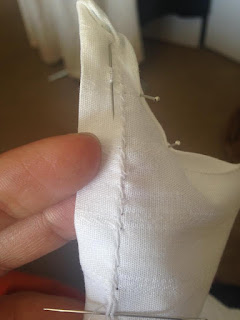
Second thing was sewing the eyelets. The first pair had metal grommits installed in the back and I wanted this set to be completely different; in fact, this pair is both front and back lacing rather than just back lacing. I highly recommend sewing the eyelets with embroidery thread, because it works just as well as button twists (for thickness).
I also learned through this project that zip ties work really well for boning. It's lightweight like the reed/cane boning, but durable enough that it tops steel boning-plus it also is the best at mimicking Whale bone rather than the actual faux Whale bone (from what I've been told).
Finally, I used lacing tapes instead of corset lacings (that thick chord that looks like a shoestring). I wanted my tapes to match the binding and the reds in the Waverly print, so the tapes were hand-dyed with RIT dye. Since I no longer had my dying pot, I had to be resourceful and utilize a used water bottle which worked out better than I expected.


 |
| My sewing mascot approves after careful inspection |
.jpg)

Comments
Post a Comment