Halloween Double Feature: Attack of the Silk Titans
Hey everybody! It's that special time again! A time where the seasons change from a God-awful hot and humid summer on the Eastern Seaboard, to a beautiful but biting cold Autumn.
BUT!
🎃 Halloween is also next week! 🎃
While on the topic of making a new gown for the season, Surprise! I have a special treat for you! I will actually be making two at the same time. My own silk taffeta ensemble, and a round gown that was commissioned by a client to be made also out of silk taffeta. So, given time constraints, it's time to really put my work to the test and use what I've learned back at Margaret Hunter's shop. So buckle up everyone, you're in for a double feature!
 |
| brownie points if you know where this image is from :) |
Feature 1: Return of the Silken Round Gown
Had a customer come to me a few weeks ago, inquiring about a taffeta round gown. Given the similarities between the structure of a round gown and an English open gown, I figured it wouldn't be an issue. I ordered the silk and other materials from Burnley & Trowbridge and JoAnn Fabrics and got to work immediately. Using the J.P.Ryan dress pattern that I rely on for all of my gowns, this one project proved to be a challenge: while the gown pattern does include instructions for a round gown, silly me, had thrown away that back part of the pattern (the apron front) years ago -not thinking that I would need it in the future.... (Here's a little word of advice: Don't throw anything away anything in the pattern kids, even if it's something you don't think you'd be using in the future...cause you will! )


So! Dealing with that crisis, I had 2 options. Look for online tutorials and follow their instructions, or ask for help from other seamstresses who have successfully made round gowns. I took the easy way out and did both. Both the tutorials and the seamstresses were very helpful but still there were more challenges. Just when I had everything cut out and hand sewn together, I glanced over at the measurement sheet that my client sent me....to my horror, the measurements for the bust and the waist did not match what was cut out for the dress; given that she lives in another state, doing a fitting wasn't the option. Immediately I panicked and called my client up to let her know of the mistake and that I would go out of my pocket to redo the entire outfit. Instead, we looked at the measurement sheet again only to learn that it was actually a typo. Not taking any chances, I just ended up mailing out the lining of the bodice immediately to see if it would fit her. If it fits her perfectly, then I can continue to make the gown without anymore issue (crossing my fingers) . . . however... if not, then there is the option of adding on a few inches along the backside of the gown.

Sorry to leave you on a cliffhanger but at the moment, the project is out of order until further notice. I'll do a separate write up on it next month.
To Be Continued........

Feature 2: Attack of the Silken Gingham
For my birthday back in September, I wanted to treat myself to an elegant gown made of silk taffeta. However, being that I have never really made a full ensemble other than a green silk petticoat during my internship at CW last year, this was going to prove to be a fun challenge... 😅.
Looking at examples of silk outfits, I really had a hard time deciding what I wanted. Did I want a full française gown, an english gown, or did I just want to take the easy route and start with something basic? Suddenly I came across this jacket and a matching petticoat! It looked simple enough to make, plus I had the pattern to make the ensamble. What I did not expect was that the fabric I initially chose (6 yards of Checked Gingham) would suddenly prove to be a bit of a tussle from the start.. I could not for the life of me find an exact replica of women wearing checked gingham in the 18th century...instead, I found plenty of documented prints dating to the early to mid 19th century. So sad to say, this gown will not be as historically accurate as I was hoping for.


Unsure about how to go about this project, I decided to work from the bottom up. As I mentioned before, my first silk taffeta project ever was a petticoat. I used 2 yards of the 54'' wide fabric and did a lot of guesswork as well as ask mathematical questions to other mantua makers online. I did 1 1/2'' wide knife pleats in the front (with a large 3'' wide box pleat in the middle), and 1/2'' wide knife pleats along the backside since I wanted a fuller skirt to best accommodate the bum pad.

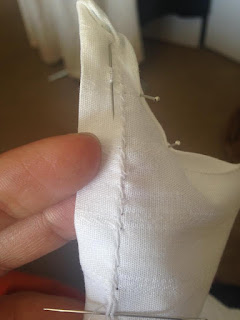
 |
| tapes are added and whipped stitched in |

I haven't decided yet on whether or not to decorate the bottom. Possibly decorating with a flounce made with either the extant fabric, or trim it with black organza. For now, it's going to remain blank until the whole of the outfit is finished and the jacket is trimmed.
Speaking of the jacket, constructing it with 1 1/2 yards was a little easier than I expected...though, I did make a mistake on cutting the front piece out (did not realize the selvages were not lined up evenly as I had initially thought before cutting them out) and had to start over (thankfully I had more than enough fabric from the petticoat to make another front piece). After piecing and sewing everything together, the caraco really turned out well-although, every seamstress and tailor knows that back stitching everything by hand is going to take some time.

.jpg)

Comments
Post a Comment