Silk Blue Round Gown
Back in October, I was attempting to make two gowns out of silk taffeta. While I was halfway into one of the projects, I realized that the measurements to the blue round gown was a little off and had to send the mockup out to its future owner for a fitting. Now that I have received the mockup and the minor adjustments had been made by adding 1" panels to the front, I am back on track and surprisingly still on schedule.
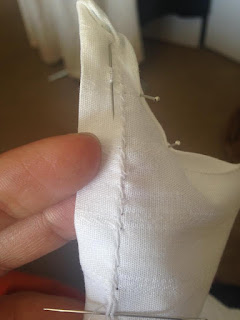
The challenging part of working with a bodice made of silk taffeta were two things: everything had to be handsewn (I was told that the sewing machine could chew up the fabric if I wasn't careful), and the second being the setting of the sleeves. I was a little worried with how they would turn out. Would it be forgiving after I set them, pinned in, and sewed them down, or would it look too poofy? I took extra precaution in making sure that never happens, by using what I like to call "the drawstring method" which is doing a running stitch and gathering it before setting the sleeve (I can do a tutorial on how that's done). |
| A beautiful gown for an elegant lady |

After it was set, I top stitched the sleeve to the bodice with tiny stitches, and it turned out looking alright. In retrospect, I could have used small backstitches to ensure that it would be more secure, but either way works as long as the stitches are small.
THE SKIRT


Surprisingly, the skirt portion of the project was very easy to do. I continued to do the skirt as if it were for an Anglaise (2 yards of fabric, and lots of knife pleats with the center pleat being in the middle). Now, because this gown was to be worn over a pair of pocket hoops, I wanted the gown to be very full in the back, so after pleating the skirt, I ran a running stitch through all of the pleats and gathered them to the waistline of the bodice and sewed them in; I then added the remaining 1 yard that I saved for the front and sewed it to both sides of the open gown. Lastly, I pleated that front piece to make a waistband so it would be tied under the bodice during wear. The only thing left for me to do was to hem the bottom of the dress to match the wearer's height.
Now... because this was her very first fitting of the entire gown, and we had not previously met, I had to bring the gown to her and do the fitting and heming. Thank God, it fit her perfectly.
This was a very interesting project to say the least. While this was my very first time making a round gown, working on a project that required silk taffeta, and had to find ways to adapt to making the outfit without the pattern that I needed, I would say that this was a great experiment. I definitely plan to make another round gown in the near future but perhaps with different techniques that would make the project look smoother on the wearer. All in due time....
.jpg)

Comments
Post a Comment