Reflecting on my recent trip to the DeWitt Wallace museum, I couldn't help but to be enamored over this beautiful apron. While I'm not 100% certain if it's an original piece or a very good reproduction, the description on the side, showed that that the chintz print was mostly preferred however there is documentation and fashion plates of women wearing pinner aprons made of other fabrics such as black silk or cotton fabrics (striped, checked, or a solid color). This particular apron is a medium block print that a middle class woman could easily afford and construct on her own if she could sew. Like all fashionable aprons, the pinner apron had a duo purpose: to protect the lady's garment and to be a fashionable accessory. The more I looked into it, the more I became interested in making it my next sewing project.
Pinner Apron Examples
 |
| Black Silk |
 |
| Blue-Checked |
 |
| Block Printed Chintz |
 |
| Block Printed Chintz; Featured in the Textiles Exhibit |
Considering the lack of using any paper patterns and a sewing machine, I had to rely on what I learned during my internship; what would be the best way to construct the pinner apron, and how? To my relief, my internship supervisor suggested that I check out
Costume Close-up for a direct how-to. After spending some time getting used the diagrams in the book, I was able to cut out my makeshift patterns using geometric shapes. The same method used in the milliner's shop today, as well as 300 years prior.
Following the diagram, I cut a wedge out the longer piece symmetrically to make the skirt and hemmed the bottom and the sides. As far as how much yardage one would need in order to make one for future projects, I would highly suggest cutting 2 1/2 yards (the 1/2 yard will be for the bib). Before I had the opportunity to purchase the book, I was under the assumption that I would need just 1 yard to make the apron like I would with a basic apron, but I miscalculated and had to buy a second yard and sew them together. The construction of the bib was like putting a jigsaw puzzle together, or Tetris: One large square overtop of 2 triangle pieces (unless you prefer to cut it out as one singular piece).
 |
| Everything laid out flat after sewing the 2 pieces together |
 |
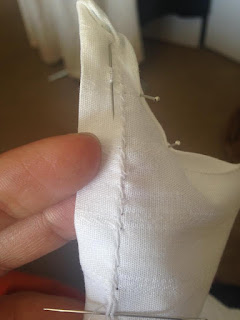
| Results of binding the bias together and then using a whip-stitch to hold down the loose fold leftover |
 |
| Composite pieces sewn together |
Next, was the tricky part. Sewing a basting stitch all the way through the top part of the skirt to gather it up, and then holding it tight enough to where I could easily set the bib as well as wrap the apron around my waist. After that, I whip stitched everything together and then added the twill tape on the inside of the waistband.
It was a really fun project to work on, and I plan in the future to make another one but with a different print (checked maybe?).


.jpg)

Comments
Post a Comment