18th century Riding Habit Shirt
 My friend Kelly gifted me with a wonderful regimental style riding habit. Coincidentally it is the same colors as my Royal Artillery unit's uniforms (comparing the two do get confusing). Anyway, the riding habit did not come with a riding shirt or cravat; I wanted to have the shirt made right before my trips to Fort Frederick's market fair and Mount Vernon the following weekend. So, after strenuous amounts of research on pinterest, costume blogs and reference books, I was ready to take on this challenge: |
 |
1780's Redingote and Riding habit examples Lady Worsley's famous British riding habit |
While riding shirts of this time period normally required the use of lightweight linen fabric, I did not have any in my inventory so, I substituted with cotton muslin instead (trust me, this will not ruin the silhouette of the outfit, and you'll still be comfortable). I used the pattern from my go-to source and immediately started working on the easier pieces: the shirt and sleeve ruffles. The pattern calls for them to be hemmed 1/4'' (preferably roll hemmed) and then gathered by using a loose running stitch; after that it's sewn to the main body of the shirt. The collar of course was the second easiest piece, as all I had to do was hem it by 5/8'', fold it in half, and then set it aside.
 |
| Ruffles for days... |
 |
The trickier parts however required help from those who knew about shirt assembly. Before asking for assistance, I read over the instructions and pinned the shirt ruffles to the main body and sewed a running stitch in the spots where there would be "gathers". However after placing the garment on the mannequin, I noticed that something didn't look quite right.... if that opening where the front ruffles are pinned was for the body, then where was the hole for my head to go?
 |
| Unless you're the headless horseman, I don't think this shirt would work |
Desperate for answers, I asked a few friends of mine about the main body of the shirt and how it's supposed to be constructed. Apparently when cutting the shirt up the middle, be sure to also also cut across in the middle so it makes a "T" (that's where you'll put your head in, as well as where to later add the shoulder plackets). I also needed to let out the hems on each side so I could later add the sleeves. Once I got that detour over and done with I was able to add the collar and pin the sides seams of the shirt body together.
 |
| The "Y" in the definitely helps |
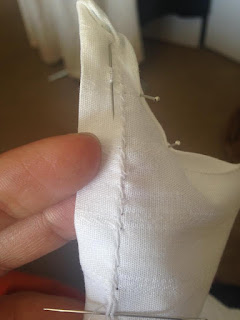
After getting the initial hardware done for the shirt portion (attaching the gussets to make the shoulders and neck and then adding the collar), I reattached the ruffles to their proper location and then added the plackets on the back of the ruffles; this protects the inside of the shirt where the ruffles are sewn to keep them from fraying, but also gives the inside of the shirt a more cleaner look.

Once I've gotten the hard part taken care of, I focused on the easier tasks of creating the sleeves. Not hard at all right? Seriously, I think this was the easiest part of the whole project. According to the pattern, the sleeves are to be cut out in a rectangle. I did a running stitch for both sides (portrait side), and then folded the rectangle in half and measured from one tick mark to the other; the openings will be needed later on for the gusset. The smaller opening of the tube will be used for the wrist. After creating the ruffles for the cuffs, I sewed them onto the smaller opening where my wrists were to go through; lastly I added the plackets and button holes to the sleeves, which turned out quite nicely.


Lastly, I added the sleeves to the rest of the blouse and pleated the back from the center fold to about 7'' to each side of the guided ticked marks that I added to the back of the shirt. Tape was then added over top, so I could correctly fasten the shirt from the back to the front so it would be tightly secured (since there are historically no buttons or zippers to close up this shirt).

Last but not least, I made a cravat and added buttons to the collar. The pattern called for dorset wheel buttons, but I thought these little buttons from Blue Cat Buttonworks were much cuter.

In retrospect, I should have used linen fabric instead of cotton muslin, but since this was predominately my mock up in the first place, I don't think it's an issue plus, I felt very comfortable wearing it at times without the outer jacket. I would definitely make this again but next time using more historically accurate techniques, than rushing to get this done before the events I was prepping this whole outfit for.

.jpg)

Comments
Post a Comment